 available on
  also available on


FlickStart Movements
Style of Movement
FlickStart movements are built-in (although you can adjust the speed/strength to suit with sliders in the 'Movement' tab). There are two types of movement:
Whether the movement type is 'simple' or 'return', there are then 9 directions you can move that FlickStart recognises. Six of the movements are flat (planar) movements like 'left' or 'up'. The other three are rotations around the three axes of the phone (or watch).
Handheld Movements and the Sensor
The handheld sensor sits in the middle of the device and is oriented so its axes look like the image below:
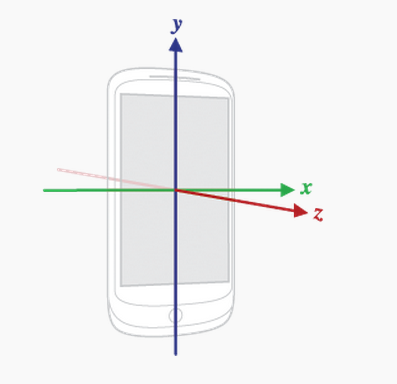
While you don't need to know about the axes for movements like 'left' or 'down', when it comes to the movements that are rotations, then you need to keep in mind which directions the axes point. Examples below will illustrate this.
If you hold the phone as shown below (left or right handed) then terms like 'left', 'right', etc. refer to your left, your right and so on.
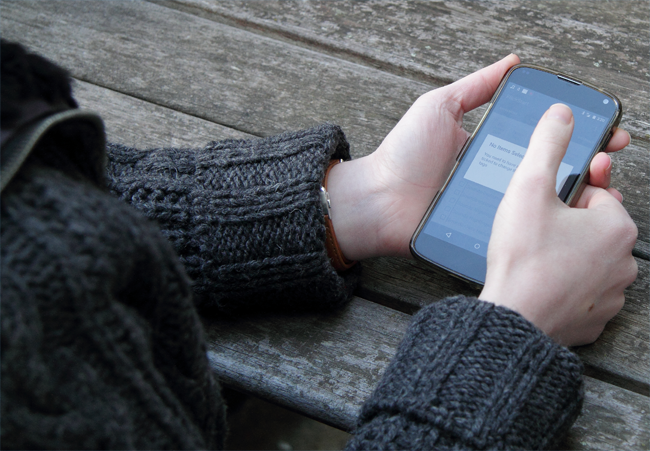
But in reality, the directions are calculated relative to the phone, not relative to you. A move left is one which moves the centre of the phone in the direction of the phone's left edge. So you can hold the phone anyway you like and move the phone to it's left when you want a left movement even if this means the phone is traveling in some totally different direction (eg. down) relative to you.
The Six Flat (Planar) Movements (Handheld)
FlickStart expects one set of possible moves to be planar. That is, the phone moves in the same plane as the phone's screen, or straight up and down relative to the screen. Each move also needs to be close to a straight line. So you should imagine the moves to be along one of the axes shown in the images below:
| Plane Move | Image |
|---|---|
| Left | 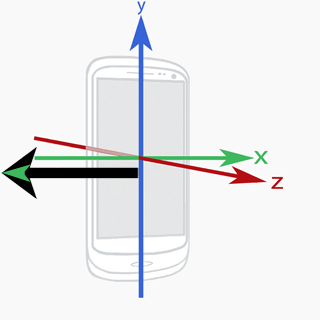 |
| Right | 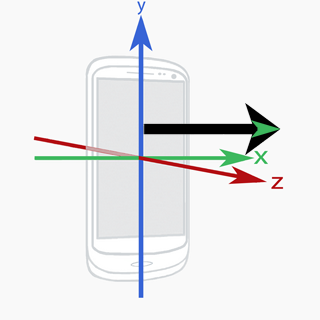 |
| Up | 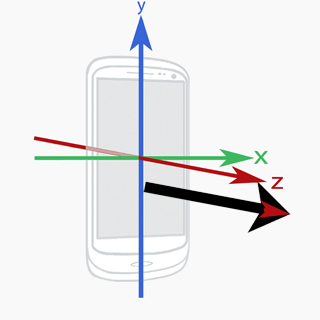 |
| Down | 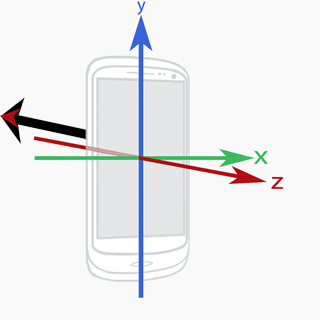 |
| Back | 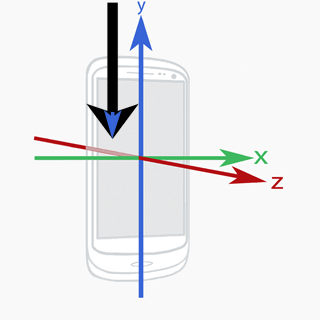 |
| Forward | 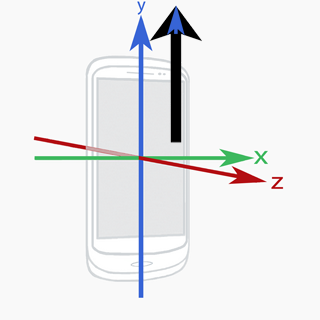 |
.
The Three Rotations (Handheld)
For the rotation moves you flip the phone around one of the three axes without too much movement from side to side or up and down. Such moves can be easy or hard depending on your grip on the phone! No single grip makes all the rotation moves easy, so you need to be prepared to change the way you hold the phone depending on the move you want to make.
| Rotation Move | Image |
|---|---|
| Roll around the X axis | 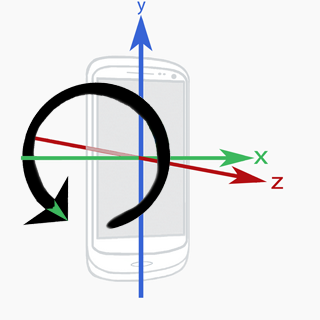 |
| Roll around the Y axis | 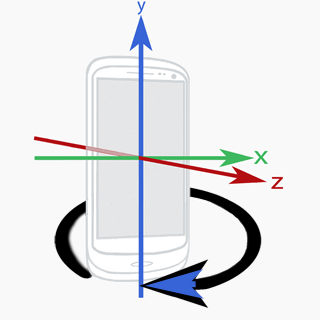 |
| Roll around the Z axis | 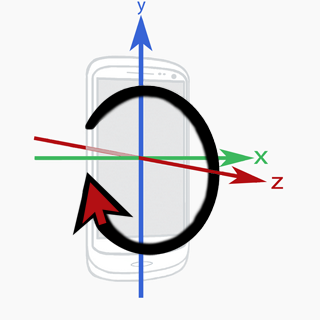 |
.
Wearable Movements and the Sensor
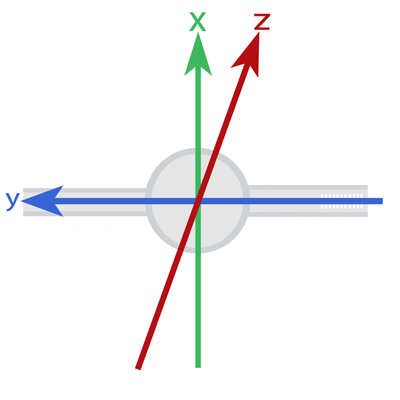
The wearable sensor sits in the middle of the device and is oriented so it's axes look like the image below:
FlickStart tries to relate your hand movements to the sensor readings so that the movements are meaningful to you rather than thinking about the axes on the watch.
If everyone wore their watch on the top of their wrist on their left hand this would be easy, but we don't assume that. Instead we ask you to put tick marks on two checkboxs on the 'WEARABLE' tab:

Once the checkboxs are set by you to match the way you wear your watch, then FlickStart is able to determine whether a move of the watch is to your left, or up, etc. so you only have to think in terms of movements relative to you (at least when you hold your hand out in front of you before starting the movement).
In reality, the app is calculating relative to the watch, so if you let your arm drop to your side rather than holding it out in front of you, then 'left' is backwards if the watch is on your left arm and forwards if the watch is on your right arm.
The Six Flat (Planar) Movements (Wearable)
Now we will show pictures of the moves using the wearable rather than the handheld. To reduce the amount of material we will do this just for the case where the watch is on the top of the left hand. In the FlickStart app, the images are adjusted according to way you set the checkboxs indicating where you wear your watch.
Here are pictures of the plane moves:
| Plane Move | Image |
|---|---|
| Left |  |
| Right | 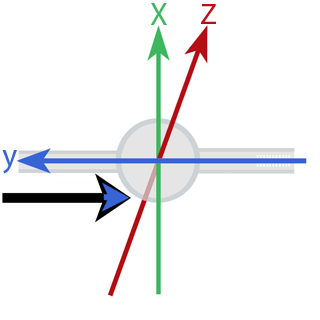 |
| Up | 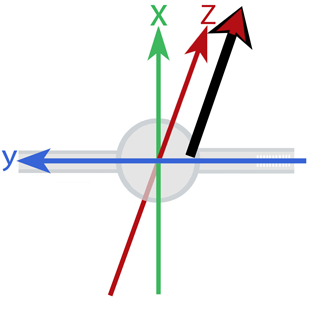 |
| Down | 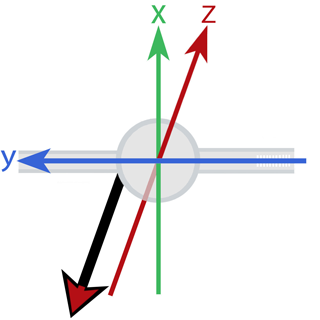 |
| Back |  |
| Forward | 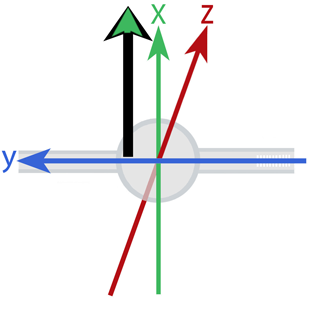 |
.
The Three Rotation Movements (Wearable)
Again we take the set of examples from a watch worn on the top of the left hand.
The rotation moves look like this:
| Rotation Move | Image |
|---|---|
| Roll around the X axis | 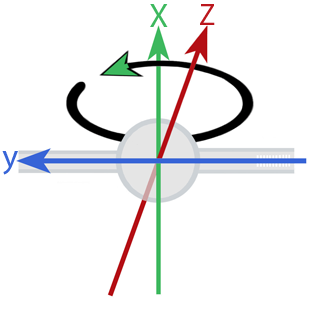 |
| Roll around the Y axis | 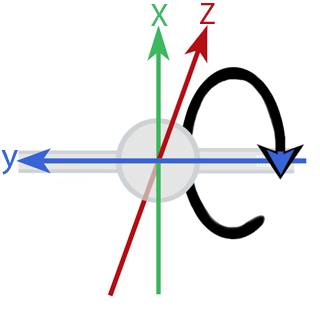 |
| Roll around the Z axis | 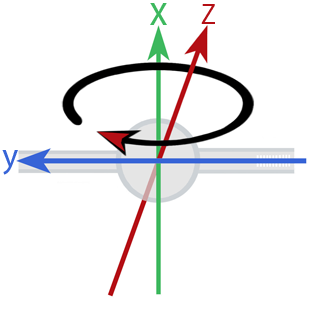 |
.
Making the Right Moves
So far the moves have been described as if FlickStart will immediately detect each move as you make them. That's not necessarily true. It takes a bit of practice and care to get FlickStart to see the move as you want it to!
Take the 'left' and 'up' moves as an example. Suppose you move the device (phone or watch) left AND upwards (at 45 degrees say). Yes, it's moving up, and yes it's moving left, but not in a plane relative to the device axes. So the app should ignore the move and it probably will. But suppose the move is somewhere in between, closer to being just leftwards, but with a bit of upward movement. What should FlickStart do in that case?
Well, if the upward movement is small, FlickStart will register a 'left' and check if any commands should be run. So FlickStart will accept a bit of 'slop' in a move, but too much slop and the move will be ignored.
The speed and strength of the movement is also important for having FlickStart trigger a command. If the time between the start and end of the movement is too long or short the movement will be ignored. The slider on the 'MOVEMENT' tab gives you some control over that. If the strength of the flick is too weak, again the movement will not be recognized. A second slider on the 'MOVEMENT' tab gives you control over the minimum strength required before FlickStart considers the movement.
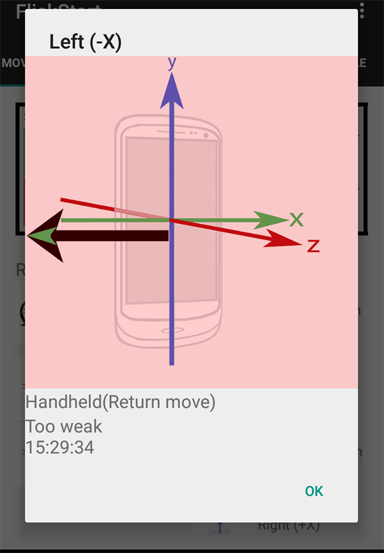
FlickStart provides two things to help match the way you move with how it wants you to move. The first is simply an indication of how it interpreted what you did. If you are looking at the 'MOVEMENT' tab when a move is done (the sensor needs to be active of course), then an image pops up if the move matched or was close to something FlickStart recognises. The following image shows what you get when the move is so close to what it expects that it would trigger any commands matching the move:

If the move was too far away from what FlickStart wants the image looks like:
If the move is too far from any of the 9 moves FlickStart recognizes, then no panel will appear at all.
